![stage-stubs-logo.svg]](https://help.stagestubs.com/hubfs/stage-stubs-logo.svg)
Quick answer: To create a free event on Stage Stubs, click Create Event, choose Free Tickets Event, add the details and venue, add each date with Add a showing, and click Publish Event. Free tickets have no booking fee, you don't need to set up payments, and families still get a ticket to scan at the door.
Even when tickets are free, it really helps to know how many people are coming. A free event on Stage Stubs lets families book their places in a few clicks, gives everyone a ticket to show at the door, and gives you a full list of who's booked. There's no booking fee on free tickets, and you don't need to set up payments.
Let's set one up.
Step 1: Start your event
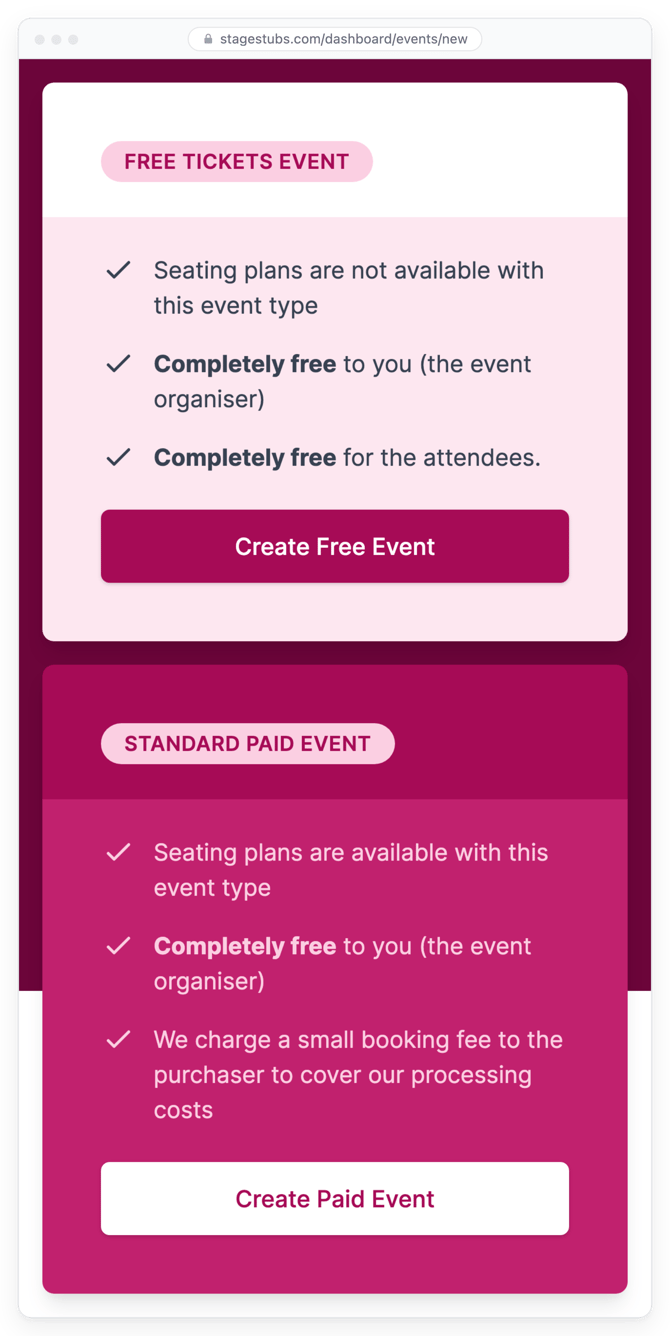
Click Create Event in the menu (or Create your first event on your dashboard if you're new). You'll be asked what kind of event it is: choose Free Tickets Event and click Create Free Event.
Step 2: Add the details
This is what families will see, so it's worth making it inviting.
Give your event a Name (3 to 120 characters) and a Description: tell people what to expect, who's performing and anything they should know, like parking or what time doors open. You've got up to 4,000 characters, though web links aren't allowed in the description.
Under Event Location, start typing the venue's name or address and choose it from the list. Have a quick look at the pin on the map to make sure it's in the right place.
Finally, add a Cover image. Click Upload image (up to 8 MB) or Choose from library, and you'll be asked to crop it to a wide shape so it looks great everywhere it appears.
Step 3: Choose any extra settings
Under Additional Settings there are a few optional extras. You can switch on Password protection if the event is just for invited families (See: Password-protecting your tickets), use Scheduled ticket release to choose exactly when tickets become available (See: When ticket sales open and close), Limit ticket purchase per customer so one family can't take all the places (See: Limiting tickets per buyer), and set when ticket sales close.
Step 4: Add your dates
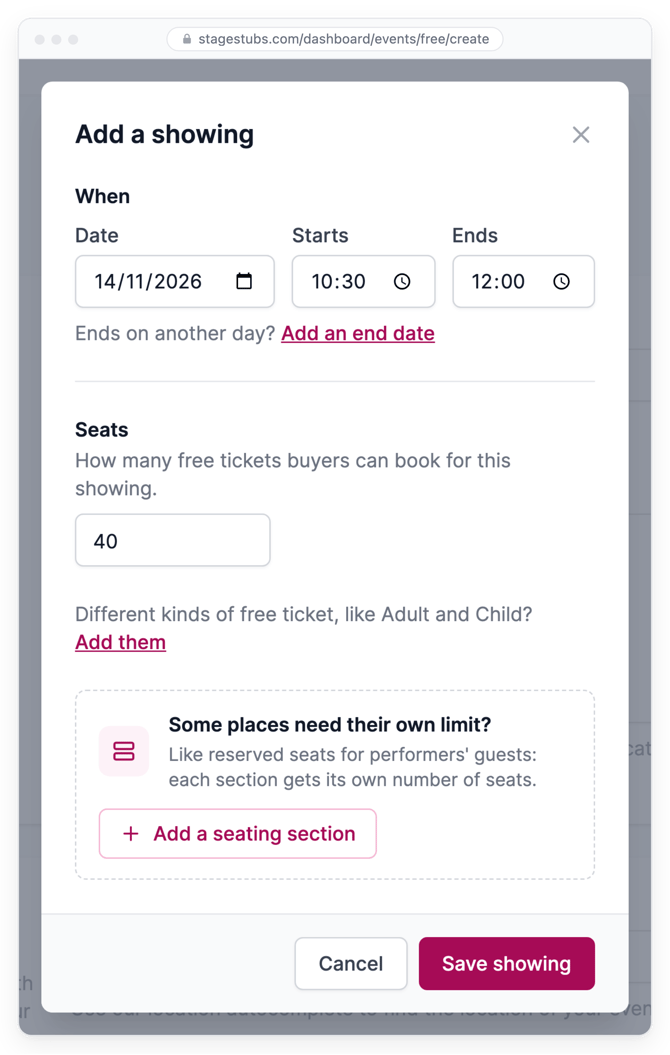
Click Add a showing and fill in:
- The date, start time and end time.
- How many Seats you have.
- Any Kinds of ticket, if you'd like to know who's coming, such as Adult and Child. This is optional.
- A seating section, if part of the room has its own limit (say, 20 places on the front benches). Click Add a seating section for this.
Then click Save showing. Got more than one date? Click Add another showing: it starts as a copy of the last one, so you only need to change what's different.
Step 5: Publish
Have a final look through, then click Publish Event. That's it, your event is live and ready to share! Not quite ready? Click Save Progress and come back to it whenever you like.
Good to know
Free events can't have a seating plan where people pick their own seats. If you'd like that for free tickets, email us and we'll help you set it up.
Worried one family might book too many free places? Setting a limit per buyer is a great way to keep things fair.
Common questions
Is there a fee for free tickets? No, free tickets never have a booking fee.
Can families choose their seats for a free event? Not on a free event, but email us and we'll help set it up.
Can I limit how many free tickets each family takes? Yes, switch on Limit ticket purchase per customer.
Related guides: Creating a paid event · Limiting tickets per buyer · Sharing your event
Need a hand? Email us at hello@stagestubs.com and we'll be happy to help.